How to sync KeePassium using WebDAV
WebDAV is a widely used protocol for remote file storage, especially for self-hosted solutions. Compatible products and services include Nextcloud, Synology, QNAP, MagentaCloud, Surfdrive, Yandex.Disk and many more.
There are two ways to sync KeePassium with your WebDAV server:
Direct in-app WebDAV support
With this approach, KeePassium behaves as a WebDAV client and communicates with your server directly. This way, KeePassium fully controls data transfer and does not depend on other apps. As a result, direct WebDAV connection is more reliable than integration with the Files app.
To configure a direct WebDAV connection, follow these steps:
- Open KeePassium settings → Network Access → enable it
- Go to the list of databases, tap + → Connect to Server
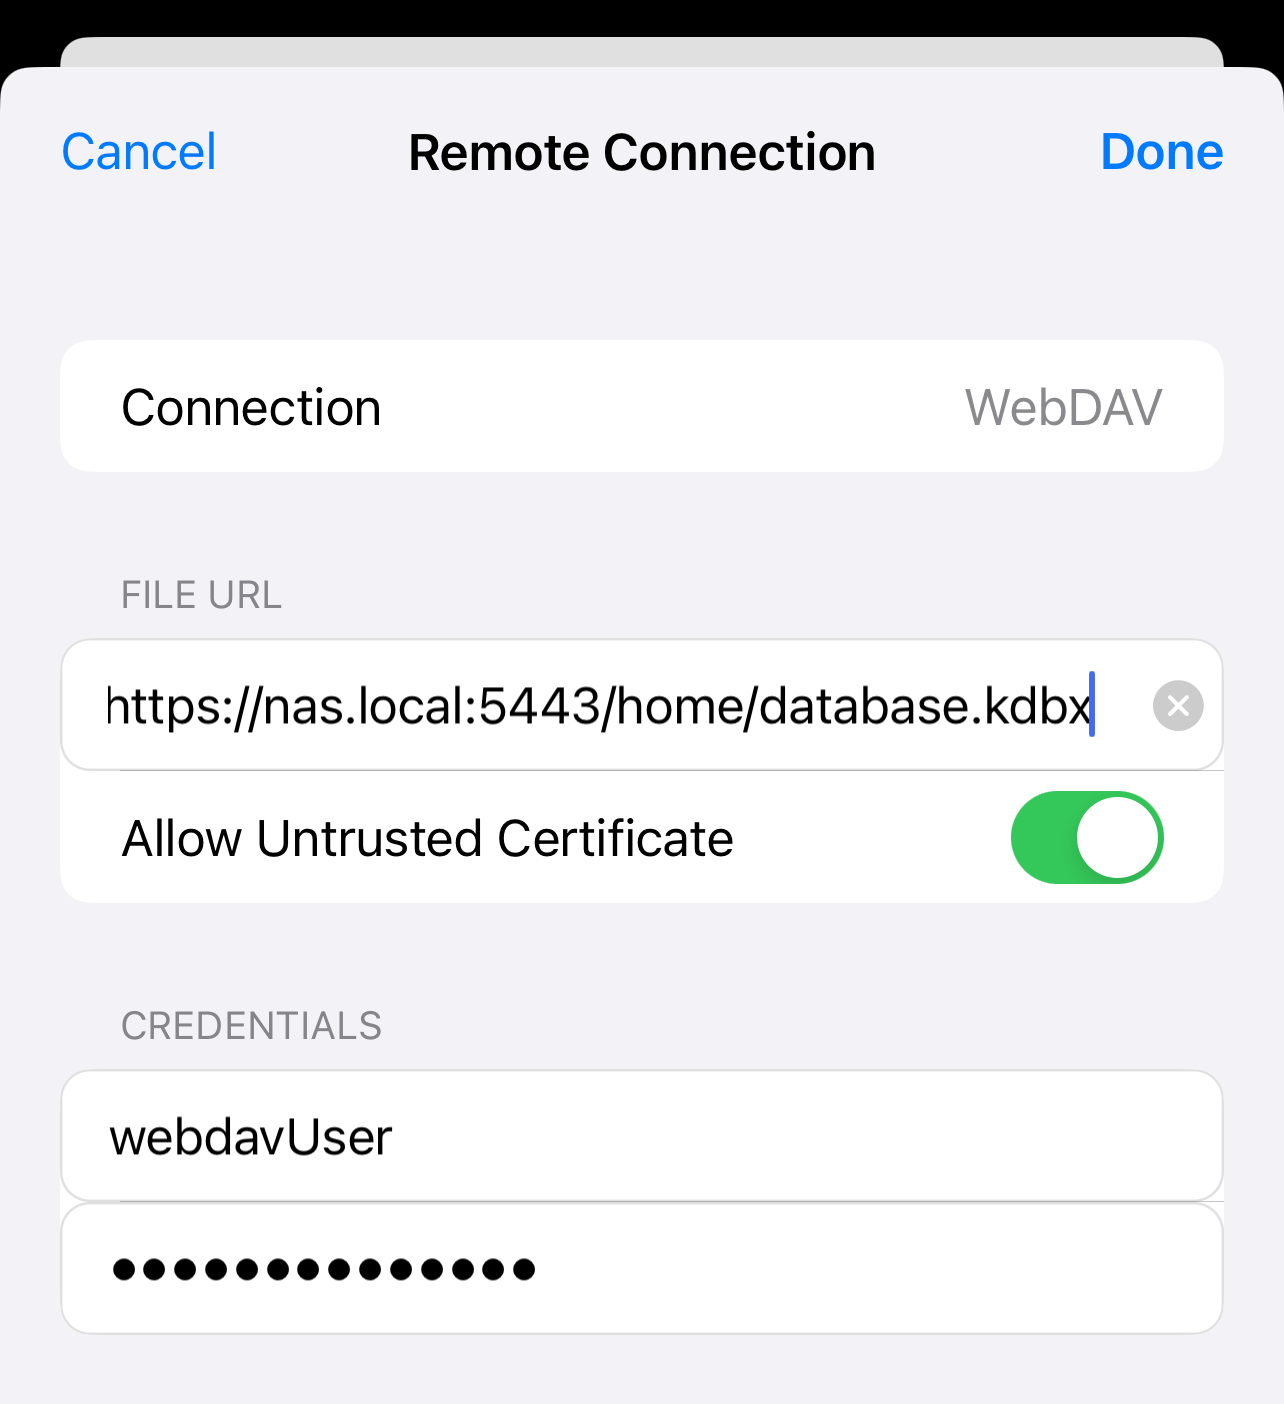
WebDAV connection setup - Enter the full URL of your database file
- Enter your server credentials
- If you use a self-signed certificate, enable Allow Untrusted Certificate
- Tap Done
- KeePassium will check the connection and add the database to the list.
Via third-party apps
You can also sync KeePassium with a WebDAV server integrated in the iOS Files app. This way, you can enforce the separation of concerns where KeePassium has only minimal access to a single file on the server. However, third-party apps struggle to work in background, and therefore sometimes suffer from unreliable synchronization.
- Install an app that integrates your WebDAV storage with the iOS Files app
- There are several suitable apps, such as BoxCryptor app (free for 2 devices), FE File Explorer Pro (paid) and others. In this example, we will focus on BoxCryptor.
- In BoxCryptor, add your WebDAV server and enter your credentials
- Open iOS Files app and make BoxCryptor visible there
- Open KeePassium, tap Add Existing Database
- Navigate to your database and select it
See also
Last Updated: 2022-10-04